Wednesday, 16 April 2014

DIY: front tie, tie-dyed tank top

Hey guys! So today I'm going to show you how to upcycle an old t-shirt into a cool front tie, tie-dyed tank top! It's also a good idea to wear an old shirt while doing this so that you don't ruin a good one with dye.


Materials:
  • Old t-shirt
  • Fabric scissors
  • Dye
  • Rubber bands
  • Garbage bags
  • disposable gloves
Step 1:
Decide how high you want your shirt to be on your waist and mark this with a sharpie.Once you have this marked, approximately find the middle of the shirt. Now you will leave about 4 inches on either side of the middle and mark this now 8 inch gap on both sides with a sharpie.

Cut the front and back of the shirt on side until you reach the line that marks the gap and repeat this on the other side. When you get to the line continue cutting straight across on the back but do not cut the front. Once you have the back cut, draw lines on the fabric hanging down on the front of the shirt so that it looks like a triangle.


Once you have the triangle cut, cut the hem off of the bottom if you haven't already. Now cut a strip up the middle and round the ends so that you have two pieces that can be tied together.


Step 2:
Cut the sleeves off of the t-shirt to your desired depth and thickness. Then fold the shirt so that you can use the sleeve you already cut as a guide for the second sleeve.


 I cut my sleeves fairly deep because I want to have low sides so that I can wear a bandeau with this.

Next cut the collar however you would like. I left mine high and didn't cut it much deeper than the original collar because I like the high collared style for tank tops.


Step 3:
This is the fun part! Now you get to tie-dye the shirt. These steps show how to do the spiral pattern but you could google other patterns if you don't want to do the spiral.

You may need to soak your shirt in soda ash depending on the type of dye you use. I had to soak mine and I let it sit in the soda ash for twenty minutes. After it has finished soaking, cover the area where you will be dyeing the shirt with a garbage bag. Don't forget to put on your disposable gloves!

Pinch the shirt in the middle or wherever you want the center of your spiral to be. 

Now turn the piece that you pinched clockwise while keeping it tight. It should end up looking like this:


Now secure this ball with rubber bands. You can use however many you want; I used three. 


After you have the ball secured with rubber bands, begin tie dyeing the shirt. Decide how you want to dye it (alternating colours, etc) and begin to dye each section. Make sure that you push the dye into each piece fairly hard so that you won't be left with too much white. 

(I know the lid is on, it's too hard to actually dye it and take pictures at the same time lol).
After the top of the ball is done, flip it over and repeat on the side that was sitting on the garbage bag. Remember your pattern and make sure you're dyeing it the same colour on this side.

Step 4:
After you finished dyeing both sides of your ball, cut the rubber bands and leave the shirt to set. I just put mine in a plastic bag and left it for about five hours. After the dye has had a fair amount of time to set rinse it out and then wash it. After you have washed the shirt rinse it once more. The water coming off of the shirt should be close to clear now. You may want to wash this separate from other clothes in the washing machine for the first few washes so that you don't ruin other clothes. 

That's it! Now you're done and you have a super cute new tank top for summer time! :-)

Tuesday, 8 April 2014

DIY: easy beanie

Hey guys! Today I'm going to show you how to upcycle an old sweater and turn it into a beanie. I saw this tutorial on youtube (https://www.youtube.com/watch?v=_p0Bb1xKau4) and I loved the finished project; so I thought what better way to re-use my old sweaters than to turn them into beanies?! (The only difference between the video and this post is that I sewed my beanie and on the video they used a glue gun).


Materials:
  • Scissors
  • Old sweater 
  • Sewing needle and thread (or glue gun)
Step 1:
Lay your sweater out flat. Now cut out the spot where your back goes. Once you have that piece cut, wrap it around your head and cut any excess fabric so that it fits your head comfortably.


Step 2:
Fold the piece that now fits your head into three sections to create a tube.


Now cut the top in a circular pattern so that the tube now resembles a hat.


Step 3:
Turn the hat inside out (1) and sew the side together (2). Now sew two top pieces that are closest to each other together (3). Repeat the previous step with the two other sides. This will leave you with three sewn sides that resemble a triangle (4). 


Step 4:
Flip the hat so it's not longer inside out, and voila! You now have a new beanie!!!


I hope everyone enjoyed this post! Leave a comment if you have any suggestions for upcoming posts. :)


Tuesday, 1 April 2014

DIY: easy upcycled jean shorts!

Hey guys! Today I'm going to show you how to upcycle and old pair of jean shorts and turn them into a completely different pair! You can do this with regular jeans as well if you like by following the same steps.
Note: The jeans I bleached were black so they turned red. Blue jeans will all usually turn white.


I'm probably going to fix the back, but I couldn't tell the colour was like that while it was still wet. 

Materials:
  • Old pair of jeans
  • Scissors or exacto knife
  • Cardboard
  • Bucket
  • Bleach
  • Laundry detergent 
  • Disposable gloves
Step 1:
Lay your shorts out flat with a piece of cardboard between one of the legs and use your scissors or exacto knife to cut a straight line on the leg to begin with the distressed look. I added two cuts to each leg, but you can do however many you like or none if you prefer. Move the cardboard to the other side and add more cuts. I added two cuts there as well and had them in the same spot. Be careful to not cut the pocket.

Flip your jeans over and add small cuts to the back pocket.


Step 2:
Add bleach into a bucket and dilute it with a bit of water (any temperature is fine). I did my jeans one side at a time, back in the bleach first and then front because I didn't want to waste bleach doing them at the same time and because I wanted all of the black bleached on the front but only some in the back. Let the jeans soak for 2-3 minutes or until the colour is really starting to show and then do the other side. Keep bleaching until you are satisfied it.

Left is when you first put jeans in bleach and right is when the colour begins to be bleached out.
Step 3:
Rinse your jeans with water. After a lot of the colour has came out dump the water that you used to rinse your jeans and then fill up the bucket or a laundry tub with water and some laundry detergent. Wash the jeans and then rinse all of the soap out. Let these jeans dry and then you're all done! You may want to wash these separate from other clothes in the washing machine for the first couple of washes just in case there is any bleach left and you don't want to get it onto other clothes.


Hopefully you enjoyed this super easy diy! Comment if you have any requests :)


Wednesday, 26 March 2014

DIY Divergent Shirt!

Hey guys! Today I'm going to show you how to make a divergent razor back shirt. If you don't know what divergent is, it's a book and now movie based on a post-apocalyptic Chicago. That isn't what this post is about though so I'll show you how to make the shirt! This is going to be my longest post yet, so just a heads up.
Finished Product
Materials:
  • Old t-shirt
  • Scissors
  • Sharpies
  • Fabric Paint
  • Sponge paint brushes
  • Cardboard
  • Wool (optional)
  • Bleach
  • Small jar/container for bleach
Step 1:
Lay your shirt out flat and cut the neck following the stitching (be careful the front is usually deeper than the back).
Use the stitching as a guide.
Step 2:
Cut the first sleeve off from the shoulder down to the armpit. You may want to outline where you want your sleeve to be with a sharpie.
Try to cut evenly to avoid jagged edges.
After you cut the first sleeve, fold the shirt in half evenly so that you can use that first sleeve as a guide and be left with two sleeves that are the same width and depth.

Use this edge as a guide.

Next stretch both of the arm holes (gently!) so that the sleeves won't look jagged. This will also prevent the fabric from tearing.

Don't pull so hard that you stretch it out!

Step 3:
Cut the bottom of the shirt following the seam. After that stretch the fabric like you previously did with the sleeves.

Step 4:
Flip your shirt over so that the back is facing you. Now cut the back straps thinner than the front so that you can create the razor back in the final steps.
Be careful not to cut the front straps!
Now take the piece that you cut off on the first side and use it as a guide for the second side.


Step 5:
To create the razor back effect you can cut this piece of fabric from the hem of the shirt off, or braid together some wool and use that.


If you use this piece instead of the wool you will put the two straps together and wrap this piece of fabric around the straps beginning with a knot and wrapping it around until you get to the bottom then ending with another knot.


On my shirt I used braided wool because I thought it would be cool to incorporate other faction colours into the shirt. I braided together a red, grey and black piece of wool for amity, abnegation and dauntless. I chose to use these faction colours because when I took an aptitude test online I had an aptitude for those three factions. 

If you use the wool you begin with a knot, wrap the wool around the straps and then end it in a knot just like you would have with the fabric.


Step 6:
This is the fun part! Now you get to paint your faction symbol onto the front of the shirt. I chose to use the dauntless symbol because as mentioned above I had an aptitude for it, but if I had to choose which faction to join, it would be dauntless.

Begin by deciding where you want to place the symbol and then put cardboard into the shirt, leaving the top side facing up. Secure the shirt in place on the cardboard with paper clips or pins.


 Now begin outlining your symbol with a sharpie either free hand or tracing. I cut the circle out and traced around it for the outside of the symbol but then did free hand for the flames.

After you have the outline of your symbol on your shirt begin to paint it on using your fabric paint and sponge brush (sorry I don't have any pictures of this part. I got too caught up in the painting forgot to take some haha).

After you have painted the symbol wait for the paint to dry before moving onto the next step!

Step 7:
Are you using a black shirt and black paint? Can't see your design? No problem! Bleach is now your best friend. 
Be cautious while using bleach!!!

Make sure the paint is dry, I waited an hour and a half so that I knew it would be completely dry. 

Now get a jar or container and some bleach that you dilute with water. Take a paint brush and brush bleach around the flames in the circle and on around the circle on the outside. The bleaching takes the colour out of the shirt and it will make the symbol stand out more. Black shirts will take on an orange/red colour after bleaching. I also added some bleach randomly to other spots on the front of the shirt just to create a more vintage feel to the shirt.

This is what the shirt looked like seconds after applying bleach.
Now you have to wash the bleach out of your shirt. Fill a sink (preferably a laundry tub if you have one) with warm water and laundry soap.


After you have washed the shirt long enough that the colour doesn't come off as much as when you began washing rinse it out and try to get all or as much of the soap out. Now let the shirt dry and you're all done!!!

Front
Back
PS: you may want to wash this shirt separate from other clothes for the first few washes so that no bleach comes off onto your other clothes.

Now just enjoy your new shirt :), if anyone has any post requests just leave them in the comments!

Thursday, 20 March 2014

Chemical Free Air Fresheners!

Hey! Today I'm going to show you how to make your own chemical free air fresheners. I'm sure that most have you know that store bought air fresheners are full of chemicals, even some that are potentially harmful to your health. So I'm going to show you two easy ways to freshen your home without the chemicals in store bought air fresheners!

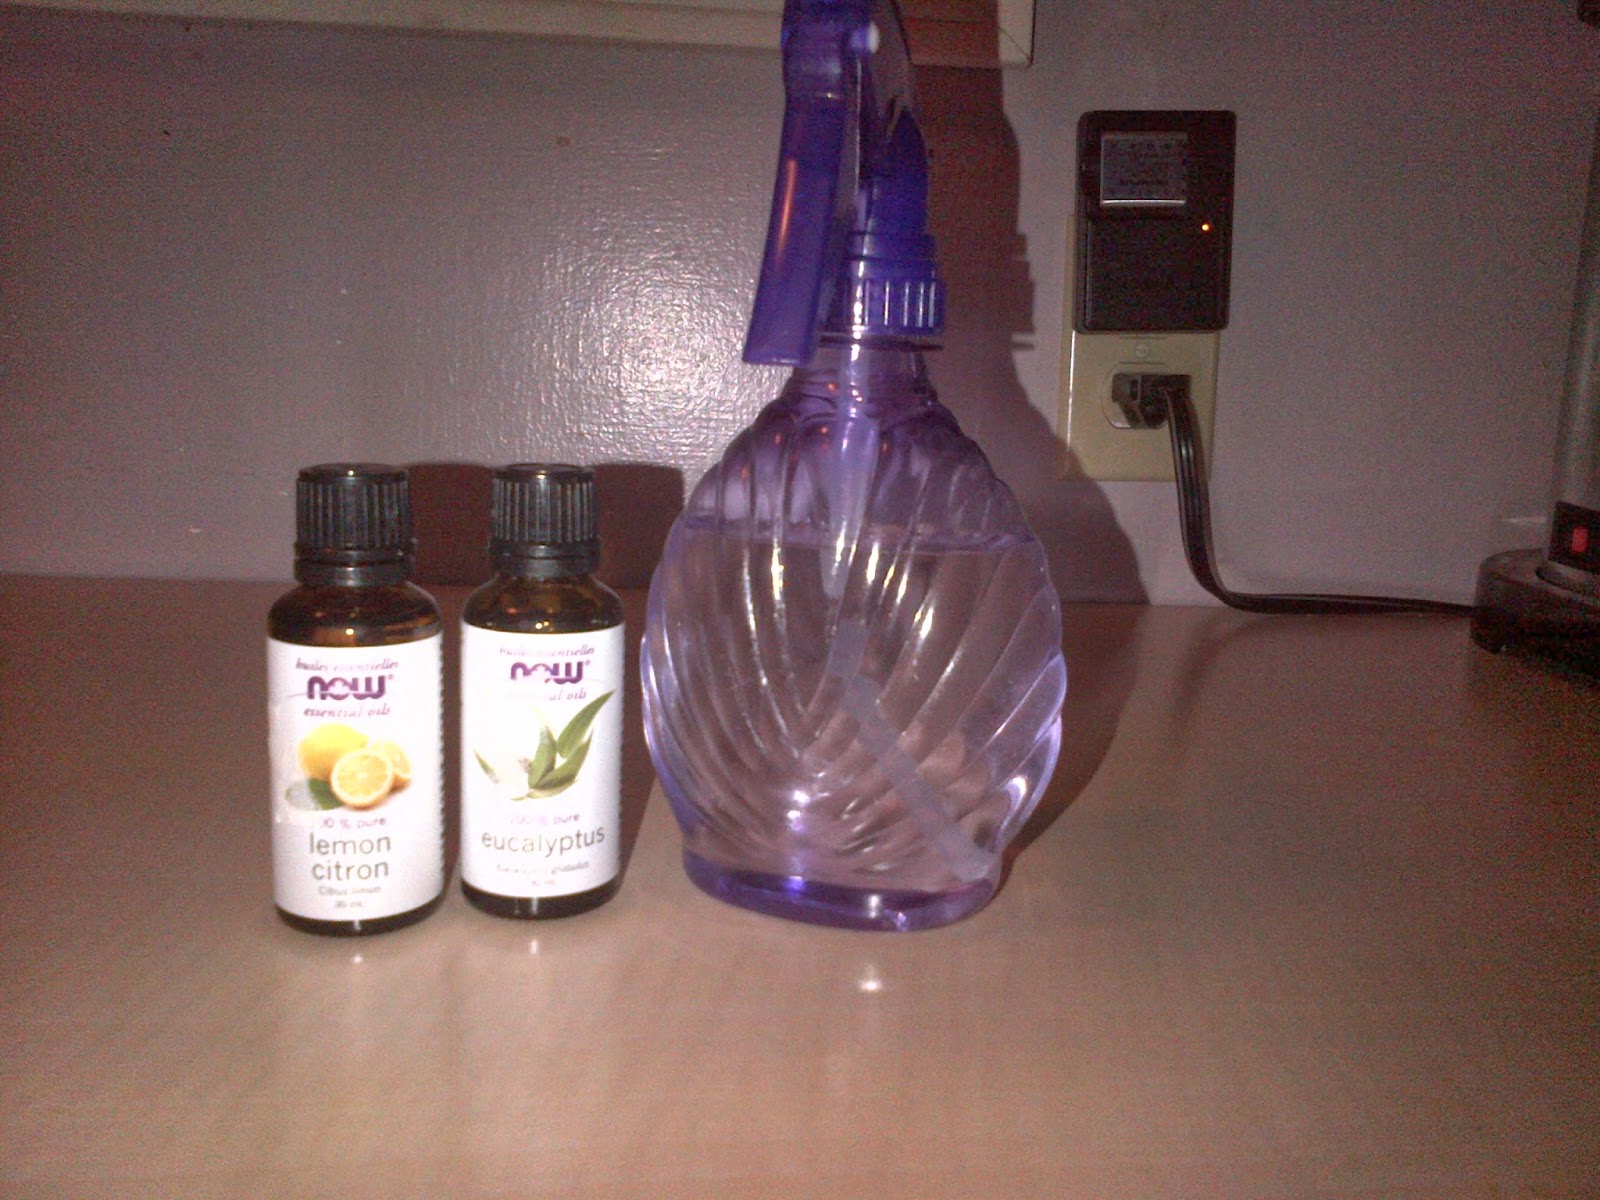
Eucalyptus and lemon essential oil air freshening spray

Materials:
  • Eucalyptus essential oil
  • Lemon essential oil
  • Spray bottle
  • Water

 Begin by filling your spray bottle up with warm water. I used warm water instead of cold water in hopes that it might mix the oils into the water as I have heard that they often separate.

Next add your oils. I added 4 drops of eucalyptus oil and 6 drops of lemon oil because the eucalyptus oil is very strong and I didn't want it to overpower the lemon. 

Tips: When I first started using essential oils I read on multiple websites that if you are going to make air fresheners such as these you must use vodka so that the oils do not break down the plastic in the nozzle or separate from the base of the spray (the vodka or water). I never tried using vodka for the base of this spray but I have noticed that when you let it sit for any amount of time (even just an hour) the oils will separate but all that you have to do is shake the bottle and they mix back into the water and smell just as good as when you first made it. I haven't noticed any decaying of my plastic bottle either, but this could possibly be because of the oils that I chose to use since they aren't as strong as some oils such as peppermint.

Other good scent combinations: peppermint oil and orange oil, lavender oil and vanilla extract, lemon oil orange oil lime oil and grapefruit oil. You can use however many essential oils that you would like in your spray, choose scents that you like and don't be afraid to get creative!

Cinnamon, clove and vanilla stove top air freshener


Materials:
  • Cinnamon sticks
  • Ground clove
  • Vanilla extract
  • A pot 
  • Tablespoon (optional)
Begin by filling your pot up to the desired amount with water (I filled mine halfway).

Next add 3 cinnamon sticks, 1 tablespoon of vanilla extract and 2 small shakes of ground clove (roughly 1/4 teaspoon).

Now put your pot on the stove on medium to low heat and enjoy the wonderful smells that will soon fill your house!

Tips: Starting off with the air freshener on medium heat and leaving it for 5-15 minutes will make it smell nice faster and then you can turn it down to minimum heat and let it simmer for as long as you desire. Another thing I enjoy doing with this is making a big pot and leaving it on the wood stove all day to simmer. Once you're done with the mixture for the time being don't throw it out! You can save this in a jar or container in the fridge and the mixture should last 2-3 days depending on how much you use it.

Other good scent combinations: cinnamon and orange peels with vanilla extract, lemon peels and eucalyptus oil, as well as lemon peels and pine needles. Don't be afraid to try whatever scents you like! 

Enjoy your house smelling great with these two easy air fresheners!

P.S. There will be at least one new post up every week by Wednesday at the latest. So stay tuned for more do it yourself fun.


Thursday, 27 February 2014

Tie-Dye Cupcakes!!

My first real post is actually here?! I know, unbelievable right? Haha well this post is going to show you how to make tie-dye cupcakes!

 To start you need enough bowls for the amount of colours you want, any type of white cupcake batter, food colouring and a muffin tin along with cupcake liners.


The essentials!

 After your batter is all prepared pour it into separate bowls. I had four bowls for four colours. Once you have the batter put into your bowls, begin creating your colours. I made blue, green, purple and pink although the picture only includes the blue, red and the purple before it was mixed.

My coloured batter.

Once you have mixed your colours, it's time to get creative! Now you can choose your technique for 'tie-dying' your cupcakes. You can flick the batter with the spoon, swirl it or just create a pattern by layering the colours. Do whatever you think looks best. Get creative!

Cupcakes ready to be baked!

My approach to the tie-dye cupcakes was to begin by layering the colours so that when you bite into the cupcake there is a continuous change of colour throughout. Once it was close to being full I began to swirl and flick the batter to create very random designs. I had no plan for the design and just did what I thought looked good. 

Cupcakes fresh from the oven.
The creativity doesn't have to end here! You can dye your icing  to add more colour if you would like or just use plain icing. I used plain white icing so that when you bite into the cupcake you get a nice colourful surprise. 

The cupcakes with icing
Cupcake with a bite taken out of it. 
ps: sorry for the blurriness, that was the best picture that I got and I just couldn't leave it out!

Have fun making your cupcakes and don't be afraid to make a mess and get creative! Leave a comment if you tried this and tell me your opinion on this. Any suggestions for new posts are welcome! :-)


Tuesday, 18 February 2014

Posts coming soon!!!

Ok, yes... I know it's been almost six months since I said that I would be putting a post up, but I'm finally going to start posting. The posts are even going to be weekly, not just whenever I feel like it or have time. The idea of the blog is still the same, just DIY posts of things that I have well, done myself. Stay tuned, my first blog post will be coming within this week or the next! ... For real this time:)